Step-by-Step Guide to Building a Pergola from Style to Structure
Pergolas can add significant amounts of style to any outdoor space. A pergola is a four-beamed structure inspired by Renaissance construction. With a wide variety of options to choose from, it can be easy to get overwhelmed by their complexity.
But you don’t need complicated construction to enjoy the benefits of a pergola. Here’s your complete guide to building a simple pergola at home, from style to structure.
Pergola Styles
Without going into the specific designs for pergolas (of which there are quite a few), there are a few basic styles to choose from. These styles are designated by the supports and the bases used in the structure.
Attached Pergola
Attached pergolas are similar to extensions, in that they’re built directly onto the main structure. They share at least one wall, flooring, and usually a few beams with the patio or your home. They essentially function as a patio or patio add-on, providing shade and privacy.
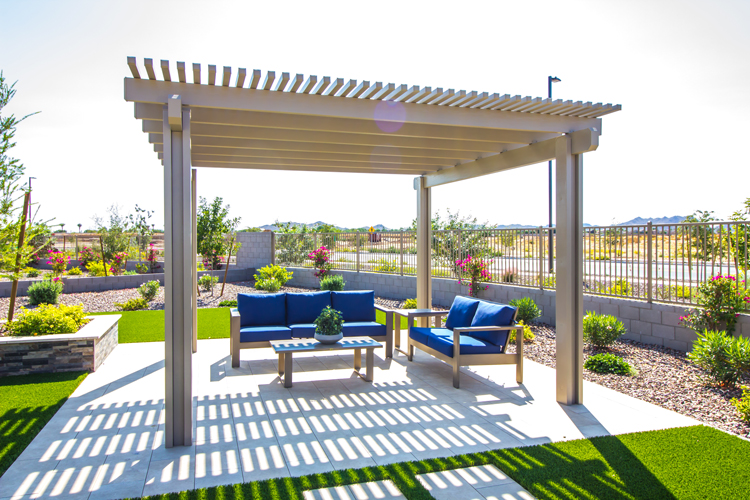
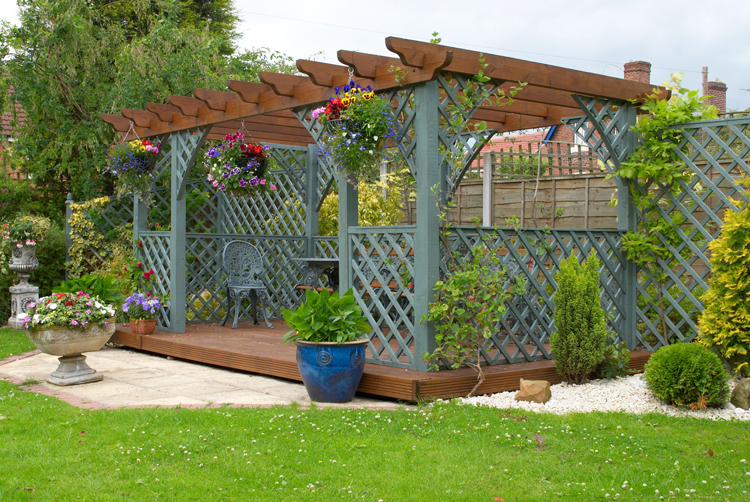
Freestanding Pergola
On the opposite end of the spectrum is the freestanding pergola, which is its own independent structure that doesn’t share any pieces with the main structure. They work well in gardens and other landscaped spaces further from the house, as a feature of the overall yard design.
Hybrid Pergola
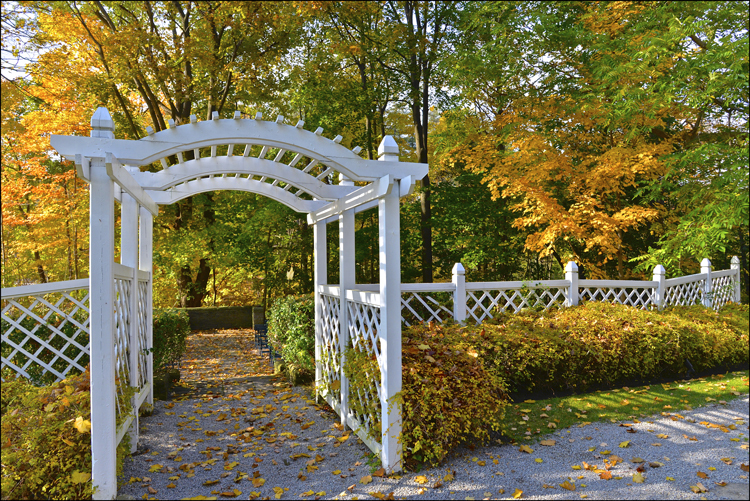
A hybrid pergola may be only partially attached to the main structure—primarily standing on its own. These pergolas make excellent entryways and can help disguise difficult terrain or strange landscape shapes.
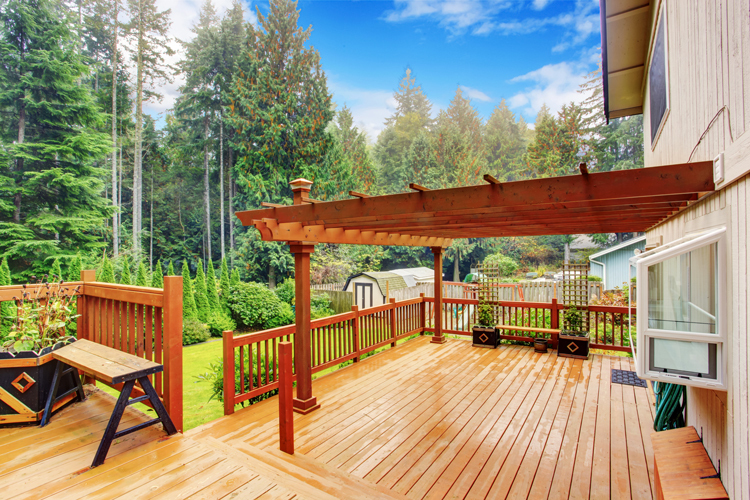
Pergola with Deck
Some pergolas have their own deck base that elevates them off of the ground. These make excellent dining areas and poolside relaxation spaces, as they’re easy to keep clean and open. They also make fantastic statement pieces around the yard.
Concrete Base Pergola
Considerably more practical in many cases than a full patio, a pergola with a concrete base attached, functions in much the same way that a pergola with a deck does, but requires even less maintenance. They’re great for small yards.
Prepping for the Build
As with any DIY project, before you pull out the tools, you’ll want to prepare for the build. This means creating a budget, gathering supplies, and planning a design.
What You’ll Need
To build a pergola, you’re going to need:
- Large posts for the main supports
- Planks for the roofing and beams
- Concrete
- Support planks
- Wooden stakes
- Hardware (bolts, washers, nuts, screws, etc.)
- Measuring tape
- Post-hole digger
- Miter saw
- Drill (Phillips-head)
- Hammer
- Wood clamps
You’ll also want to have whatever finishing touches you plan on having at the end on hand. The exact sizing and number of things you’ll need will vary depending on the plan you’re using.
How Much It Will Cost
The cost of your pergola is going to depend on the plans you use, where you get the materials, and how it’s assembled. To start with, plans for pergolas are available for free online, so you won’t have to pay for that unless you’re specifically hiring a designer for the space.
Generally, the actual materials themselves are going to cost between $2,500 and $5,000, depending on their quality and rarity. They may cost less than that if buying a prepackaged pergola kit.
If you weren’t planning to build the pergola yourself, you might be looking at another $1,000 in labor costs. Luckily, doing the project yourself costs you nothing but time.
Planning the Pergola
Before any construction starts, you should check with your local government about whether or not you need a particular permit or to follow any kind of regulations regarding backyard renovation. Some places don’t require any notification, while others may have limits on what can be built, and at what times construction can occur.
When you’ve made sure you’re working within legal limits, you need to pick a style of pergola. As final prep, you’ll want to measure the area you’re planning to install the pergola in and find an appropriately sized design. As mentioned, most plans are available online, and will include measurements and specific instructions that you can follow and adjust to match your yard’s needs.
How to Build a Simple Pergola Step by Step
Here is your step-by-step guide to building a simple, freestanding pergola.
Prep the Ground
Make sure the ground that you’re using is completely level and free of any debris. Remove any large branches, rocks, or roots in the area.
Mark out the locations of your four supporting beams ahead of time using the wooden stakes. They should be equidistant from each other, so be sure you’re using your measuring tape for accuracy.
Add Cosmetic Touches
Stain or paint all of the pieces you’re going to use before building. This can technically be done after assembly, but doing so before lets you get easy access to every piece and ensures even coverage with the stain or color.
Dig Out Your Base
Using your post-hole digger, dig out four evenly spaced post holes. These should be deep enough to hold your posts upright completely on their own.
Set the Posts
Put your posts into their holes and support them with planks at an angle against the ground. Make sure that all your posts are level before pouring in your concrete to fully surround them. Check your leveling again and adjust as necessary, then leave to set completely.
Cut the Beams
While your concrete is curing, prep the beams and rafters by measuring then cutting the pieces to fit. You’ll need two longer beams per side, but the number of rafters depends on the plan you drew up before. Reference it.
This is when you can optionally cut a decorative angle into your rafters’ ends.
Assemble
Position the crossbeams, one inside and one outside, between two of the posts, check their leveling, and attach them with temporary nails first, then your longer carriage bolts once their position is set. Do this for all four sides.
Lay your rafters perpendicular to the crossbeams, spacing them equally throughout the pergola roof. Check your spacing, making sure that the overhang is equal on all rafters, then fasten them using screws at 45-degree angles.
Touch-up and Final Cosmetics
Fix any chips or spots formed in your cosmetics by the assembly. You can now add any plants, fabric roofing, or canopy that you want to your pergola.
How AVO Fence & Supply Can Help
AVO Fence & Supply has a wide variety of customizable pergola kits that would look beautiful in your garden. With styles from classic to contemporary in cedar or vinyl, there’s really one for every occasion.
With more than 40 years of experience in the Northeast, the artisans at AVO Fence & Supply handcraft each piece to suit the project you envision. Not only that, but they also offer expert advice to help your piece really stand out and stand the test of time.
Contact AVO Fence & Supply today for your professional consultation, to make your dream pergola a reality.