A Step-by-Step Guide from Style to Structure
If you’ve ever sat in a friend’s backyard and admired a pergola, you know how much charm it can add to an outdoor space. These four-post, open-roof structures have been around since Renaissance times, and today they’re just as popular for adding shade, style, and a cozy gathering spot to any yard.
Here’s the best part—you don’t need to be a master carpenter to build one! With a little planning, the right tools, and some patience, you can create a beautiful pergola in a weekend or two. Let’s walk through your options and then break it down step-by-step.

Pergola Styles You Can Choose From
There are many designs out there, but here are the main types:
- Attached Pergola
This type connects directly to your home—kind of like a patio upgrade. One or more sides share a wall or beams with your house, creating an extension of your living space. Great for shade right outside your door. - Freestanding Pergola
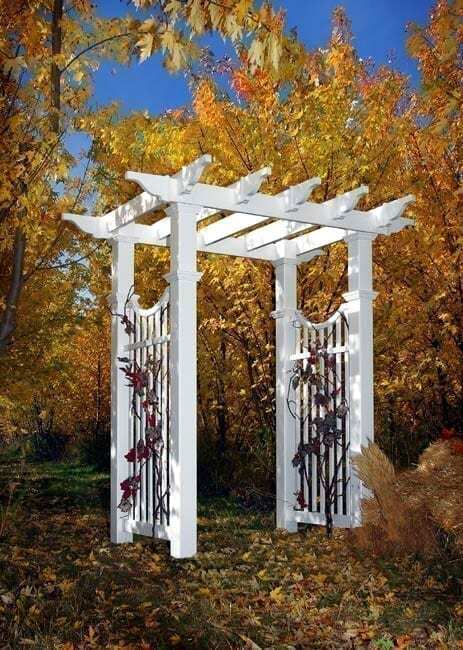
Think of this as a stand-alone feature in your yard. It’s perfect for creating a little getaway spot—like over a garden bench or as a centerpiece for your lawn. - Hybrid Pergola
Partly attached, partly freestanding, hybrids make great entryways or can help work around tricky yard layouts. - Pergola with a Deck
This design comes with a raised wooden platform underneath—ideal for dining areas or by the pool. - Pergola with a Concrete Base
A low-maintenance alternative to a deck. Perfect for small yards, easy to clean, and still just as stylish.
Your DIY Pergola Game Plan
Gather Your Supplies
Here’s the basic shopping list (quantities depend on your design):
- 4 large posts for main supports
- Wooden planks for beams and rafters
- Concrete mix
- Support planks
- Wooden stakes
- Hardware (bolts, washers, nuts, screws, etc.)
- Measuring tape
- Post-hole digger
- Miter saw
- Drill (Phillips-head bit)
- Hammer
- Wood clamps
Tip: If you plan to paint or stain your pergola, get those supplies ready too.
What Will It Cost?
If you’re building from scratch, expect to spend about $2,500–$5,000 depending on materials. This range covers standard wood options like pressure-treated pine or cedar, but costs can rise if you opt for metal or custom design features. A pergola kit can sometimes be cheaper, with pre-cut parts and step-by-step instructions, making assembly more straightforward and eliminating the need for specialized tools. Hiring help will add roughly $1,000 in labor, so DIY-ing saves a big chunk. By building it yourself, you have more control over the process and can tailor the design to fit your space and budget, while also cutting down significantly on overall costs.
First Step: Check the Rules
Before you start, check local building codes or permit requirements. Some towns don’t mind small backyard projects, but others have specific rules about size, location, and even construction times.
How to Build a Simple Freestanding Pergola
- Prep the Ground
Choose a flat, clear area. Remove rocks, roots, and debris. Mark your four post spots using stakes, making sure they’re evenly spaced. - Pre-Stain or Paint Your Wood
It’s easier to get even coverage now than after it’s assembled. - Dig the Post Holes
Use a post-hole digger to create four deep, evenly spaced holes. - Set the Posts
Place the posts in the holes and brace them with angled support planks. Check they’re perfectly straight, then pour in concrete to hold them in place. Let it cure fully before moving on. - Cut the Beams & Rafters
Measure carefully and cut your wood to size. Two long beams per side, and as many rafters as your design calls for. For a fancy touch, cut decorative angles on the rafter ends. - Assemble the Frame
Attach two beams between each pair of posts—one on the inside, one on the outside. Secure with temporary nails first, then bolts when they’re perfectly level. - Add the Rafters
Lay rafters across the beams, spacing them evenly. Make sure the overhang matches on each side. Screw them in at a 45-degree angle for stability. - Touch-Up & Decorate
Fix any scratches or missed spots in the paint or stain. Add climbing plants, a canopy, string lights, or fabric panels to make it your own.
How AVO Fence & Supply Can Help
Want to skip the measuring and cutting? AVO Fence & Supply offers customizable pergola kits in cedar or vinyl, with styles from classic to contemporary. Check out our catalog! With over 40 years of experience crafting beautiful outdoor structures for New England homes, our team can help you design and build a pergola that’s perfect for your space.
Let’s turn your backyard into your favorite place to be. With locations in Stoughton, Hingham, and Plymouth, AVO Fence & Supply provides high-quality materials and supplies to homeowners and professional installers. Contact us today for a consultation at 781-341-2963 and start planning your dream pergola!