Proper Install for Long Fence Life
Published by
Andrew Knott
on
Fences don’t require a lot of equipment or specialized tools to install, making them an attractive DIY project for some homeowners.
Whether you plan to install a fence yourself or hire an AVO-approved contractor, these fence installation tips can help ensure that you have a fence that will grace your property for many years to come.
Before You Install Tips
- Never estimate your property line. Your local planning and zoning department can provide you with a plat map of your property, so you can properly designate your property boundaries and better plan the fence's location. Most professional fence contractors install a foot inside the property line, just to be on the safe side. If you're still unsure, we suggest having your land surveyed.
- Map out your property line and mark all underground utilities. Call Dig Safe, it’s the law!
Read More:
How to Install a Fence: Planning Your Project
Wood Fence Install Tips
When installing wood fence, you want to make sure that you have good drainage and are not creating conditions that will cause the wood to rot prematurely. You’ll also want to choose the proper sealant or stain that is good for your fence type.
- Adding a few inches of gravel to the bottom of each post hole for drainage is a good idea (but not necessary if you already have good drainage).
- When setting your posts we suggest avoiding concrete unless it is necessary. Concrete can act as a sponge, drying out the wood, and causing it to rot.
- To protect your wood fence from water damage, you may need to seal it. Check that the finish you choose is safe for the type of fence you have.
Read more:
How to Install a Fence: Wood Fence Basics
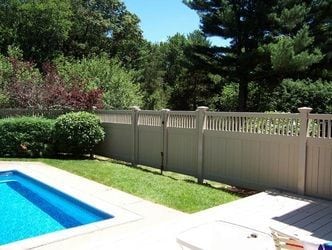
Vinyl Fence Install Tips
When installing vinyl fence, you want to make sure that all posts and panels are level, and that any gates are properly fitted so that they aren’t bearing any extra weight or friction.
- After each section of posts and panels is added, observe–you may need to lower or raise posts by prying them out and re-tamping.
- If your fence has gates, follow specific instructions for installing them.
Read more:
How to Install a Fence: Vinyl Fence Basics
Bufftech Vinyl Gate Installation (video)
Chain Link Fence Install Tips
When installing chain link fence, it is important to keep the mesh upright as you stretch it out along your fence line to establish proper tautness.
- To stretch out the chain link mesh, start at the top, weaving a tension bar through each “diamond” and through each tension band. The three tension bands should be spaced equally along the height of the post. Roll out the mesh along the outer perimeter of the fence line and temporarily attach wire ties every five or six feet to keep the mesh upright. Stop a few feet short of the fence post to stretch the mesh. Run a tension bar down through each “diamond” to the ground. Attach the come-along hook to the tension band’s bolt at the terminal post and the other hook to the tension bar. Ratchet until the mesh is taut.
- If you are installing a gate, you will want to attach the necessary hardware loosely at first, making sure all the latches and hinges line up. When everything is in place, go back and tighten the hardware.
Read more:
How to Build a Fence: Chain link Fence Basics
More than your local fence company, AVO Fence & Supply knows there is always more to learn when it comes to the latest tips,technology and professionalism in the fencing industry. We’re taking that expertise and sharing it here. Start planning your next fencing project today with AVO Fence & Supply.