This post is one of a few in our “How to Install a Fence” series. Check out our other posts for a complete fence installation guide.
How to Plan Your Fence Project
How to Build a Wooden Fence Step by Step (Without Concrete)
7 Step Guide for a DIY Fence Project
So ... you’ve decided to install a fence—that’s great!
But wait ...
Do you know how to install a fence?
Are you sure?
We don’t recommend jumping into installing a fence without first knowing what you’re doing. Otherwise, it could end up costing you more money in the long run.
 What You’ll Need Before You Begin
- Posthole digger
- Shovel
- String line
- Level
- Hammer
- Nails/screws
- Gravel and cement
- Trowel
- Stakes
- Wood fencing preservative
- Fence posts, rails, and boards
HOT TIP: Before you do anything else, check with your subdivision and/or homeowners association to see if they allow fences. If they do, find out if there are any restrictions, such as types of fencing allowed (only chain-link, no vinyl fencing, etc.), fencing height, or any other building and ordinance stipulations for legal depth and diameter for fence-post holes.
You will also need to make sure you know your legal lot line to avoid any neighbor disputes and/or lawsuits going forward.
How to Install a Fence in 7 Easy Steps
-
Plan Fence Post Spacing
Most people space fence posts between 6 and 8 feet apart.
-
Set the Fence Post Corners
Place the fence post corners in place first.
-
Align the In-Between Fence Posts
 To place the in-between fence posts, stretch a string line from each corner post; then mark the position of where you would like to place each post.
-
Prepare Your Fence Post Holes
Don’t make your postholes too small. It’s best to make the hole width three times wider than the post. Next, you will add a 3-inch layer of pea gravel to the hole and tamp it down. This will help reduce moisture retention by helping the rainwater drain into the subsoil.
-
Set Your Fence Posts
You will want to add a wood preservative to the bottom of the posts to hinder rotting. Traditionally, you would bury about a third of each post into the ground, making sure they are level and properly aligned. You can do this by installing the corner posts first and using aligning strings between the corner posts top and bottom. After that, mark points on the top of the line to mark where the centers of the intermediate posts will go. Place your posts in the holes. Then you can add the rapid-setting concrete to the hole while trying not to disturb the posts. Fill the hole with concrete to a point that’s slightly above the ground and use your trowel to slope the concrete away from the post.
After you’ve added the cement, double-check to make sure the posts are still level before the concrete hardens, and readjust them if needed.
HOT TIP: Rapid-setting concrete is just as the name implies—it sets very quickly, usually in about 15-minutes. Therefore, it’s best if you don’t make up a large batch at one time. A 60-pound bag of concrete will give you about 0.5 cubic feet of cement. So you might need to use more than one bag at a time depending on the volume of your holes; however, don’t make up more than you can use in 10-15 minutes.
-
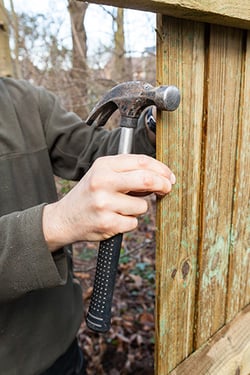
Place the Rails on Your Fence Posts
First, install the top and bottom rails (usually 2x4s) to the posts, making sure they are aligned with each other as you go across. The bottom rails should be placed at least 6 inches above the ground to help keep the fencing pickets from decaying as quickly. Use nails or screws to attach the rails to the posts. You can also use rust-free or galvanized fasteners or fence brackets if you prefer. Then add the middle rails; again, making sure they are aligned with each other as you go across. The cross rails should be installed on the inside of your fence. This ensures that the rails will only be seen from inside your yard. This is for a variety of reasons. First, it looks better and gives your home better curb appeal. Additionally, some jurisdictions don’t allow you to install a fence with the rails facing outward. And, installing the rails on the inside will help with security as well because it prevents a criminal, or anyone for that matter, to use them to climb your fence so they can look at what’s inside your yard.
HOT TIP: The 2x4s are installed with the narrow side of the picket facing up to help limit sagging, with one exception. Installing the narrow-side up at the top rail and the wide-side up at the cap rail will give you the best possible combination for the strongest and most durable fence possible.
-
Install the Fence Pickets
Most people install the fence pickets vertically; however, they can be installed horizontally if you prefer. To install your fence pickets vertically, begin by installing one fence picket at one corner post and another picket at the opposite corner. Then use your level to make sure they are level. Next, take your string line and tie it to each end of the fence pickets you just installed. Gather your fence pickets and stand them up against the fence, side by side. Now you can start attaching the pickets, making sure they are level with the string line. You might have to cut any pickets that are too long if the ground is uneven. Continue by filling in all the in-between fence pickets until you’re done. Just make sure you check your fence pickets every so often to ensure they are all still level.
HOT TIP: Install the nails in the center of the rail about 1 inch from the side of the picket. This will help avoid splitting the rail or picket. And, if you care about aesthetics, be sure the nails are nailed into the pickets in a straight line, and not randomly.
That’s it—you’re done!
Enjoy!
If you don’t have the confidence or expertise to take on the DIY project yourself, then contact us so we can set you up with one of our professional installers. AVO partners with contractors, landscapers, pool installers, and architects throughout New England to deliver exceptional quality fencing to our customers. We are dedicated to ensuring that our customers receive all the resources they need to successfully complete their next project. Get in touch with us today to make your dream fence a reality.